First off- thanks to Nate at UBGHolsters for providing the die-cuts. He made this project REALLY easy, and confidence-inspiring.
This all came about because I wanted an IWB holster for my Tanfoglio TZ75 in 10mm. It's similar to the CZ, but different enough 'round the trigger guard that he wasn't sure it would work. So the whole "thought about building your own?" idea came about, and we ran with it from there.
He sent me a set of die-cuts (think, flats cut from cowhide, shaped like a holster but without the molding), a set of straps (which he was nice enough to assemble as I didn't have the press, belt clips (unrelated to the project but thrown in because he's a nice guy), and instructions. He's also taken great effort to reply to 40+ emails in the course of the discussion.
I provided the tools -a 7.62X39 round (get the bitter end of the line started), a Fisher Space Pen (for boning), rubber cement, a Dremel, draftsman's dividers, and a Sewing Awl- and effort. This was very much a "use what ya got laying about" effort. There are purpose built tools for this sort of work, but they're not needed.
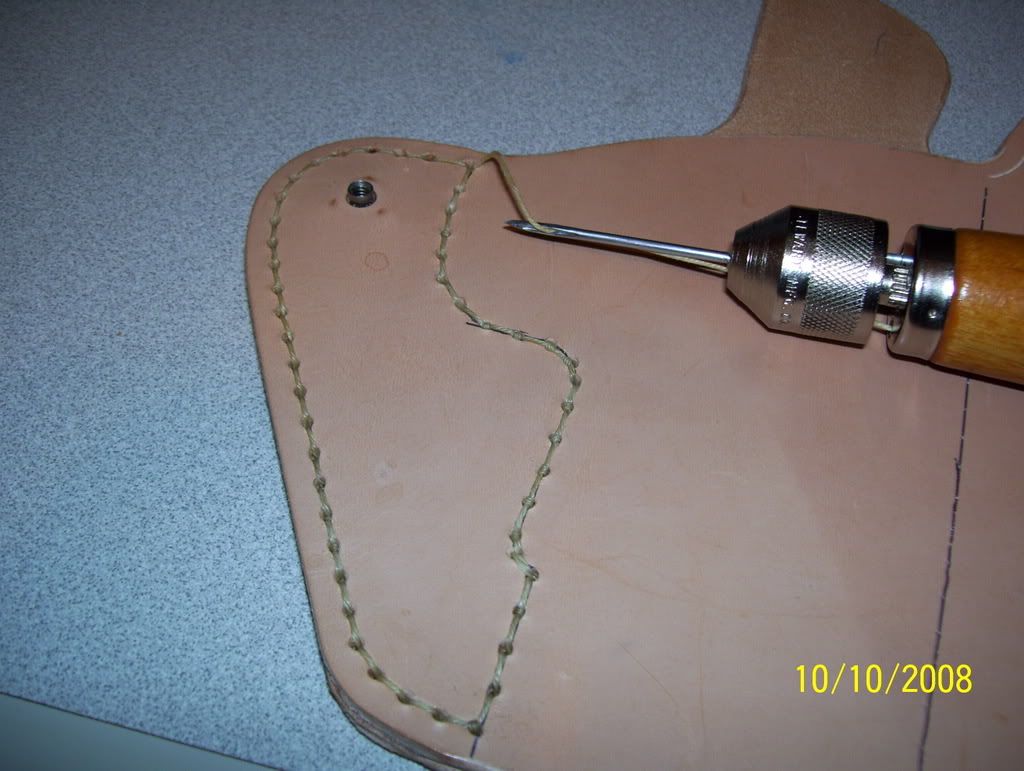
To assemble the holster, I took the diecuts and lined them up all around the perimeter. Nate was good enough to mark out the glued area by way of using his CZ75 as a model for the TZ that now takes its place. I applied rubber cement to each side in accordance with the directions for a permanent bond, and let the joined pieces sit overnight under my rangebag with a few pistols in it. I measured off 5 millimeters (about as close as I could figure to 1/5 of an inch) and locked my dividers in, then followed the stitchline with them as if I was plotting a course, which if you think about it, I was.
I took the joined pieces, a 2X4 bit of scrap, my Dremel, and a TINY bit (about 1/32 if I recall- it's too small to read), and drilled at each mark the dividers had left. I used my sewing awl to sew up each stitchline, and then tried to testfit the weapon- it will NOT go, dry, don't even try it.
So then I wet the holster thoroughly in hot bath water. You don't want to let it sit in there for any more than a minute or so- I actually just grabbed it and slid it around in the water till it was visibly wet through (watch for the color change). At this point the leather will have the consistency of wet clay. I took my well-oiled gun and slid it into the holster- it will go with a little effort- and then started on the boning.
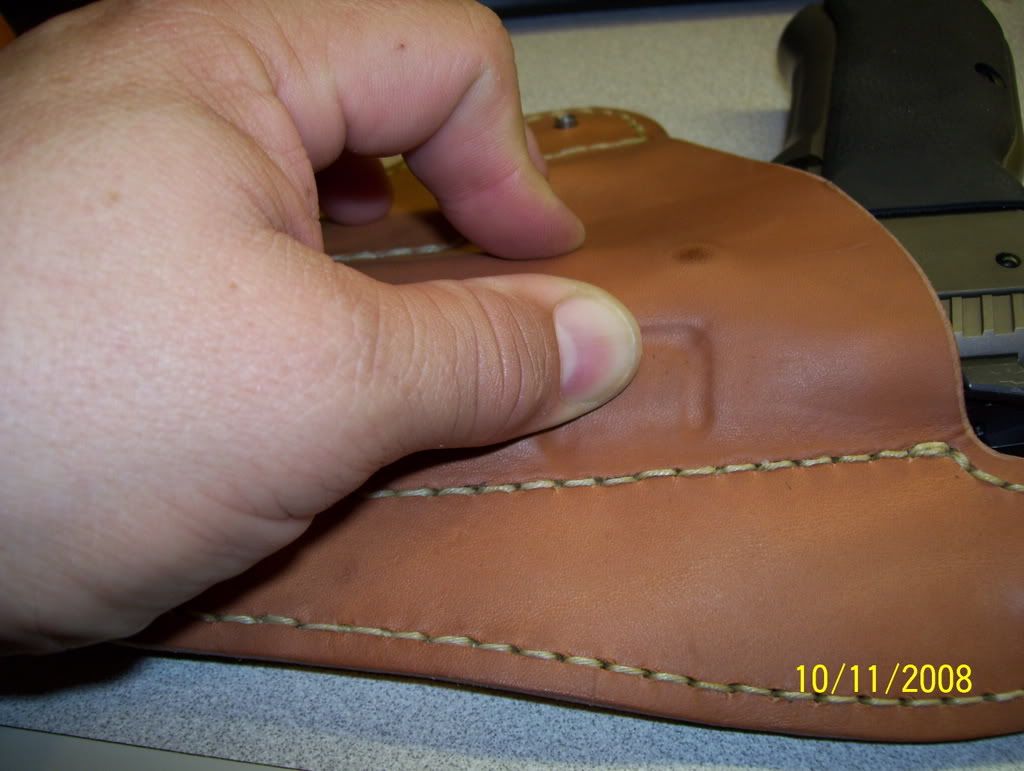 You use your fingers and smooth the leather around all the points of the weapon- the safety, the triggerguard, and so on. With automatics, pay particular attention to the ejection port and the trigger guard- this is where your retention comes from. Now is a good time to set the holster in terms of it's curvature, as well- it's going to have to curve to go around the body part it's designed to fit (round my waist in this case). Once happy, pull the weapon out, and set the holster in front of a fan for a few hours to a few days, depending on how wet you got the leather. Now- go dry, clean, and oil your weapon, particularly if you've got a parkerized finish!
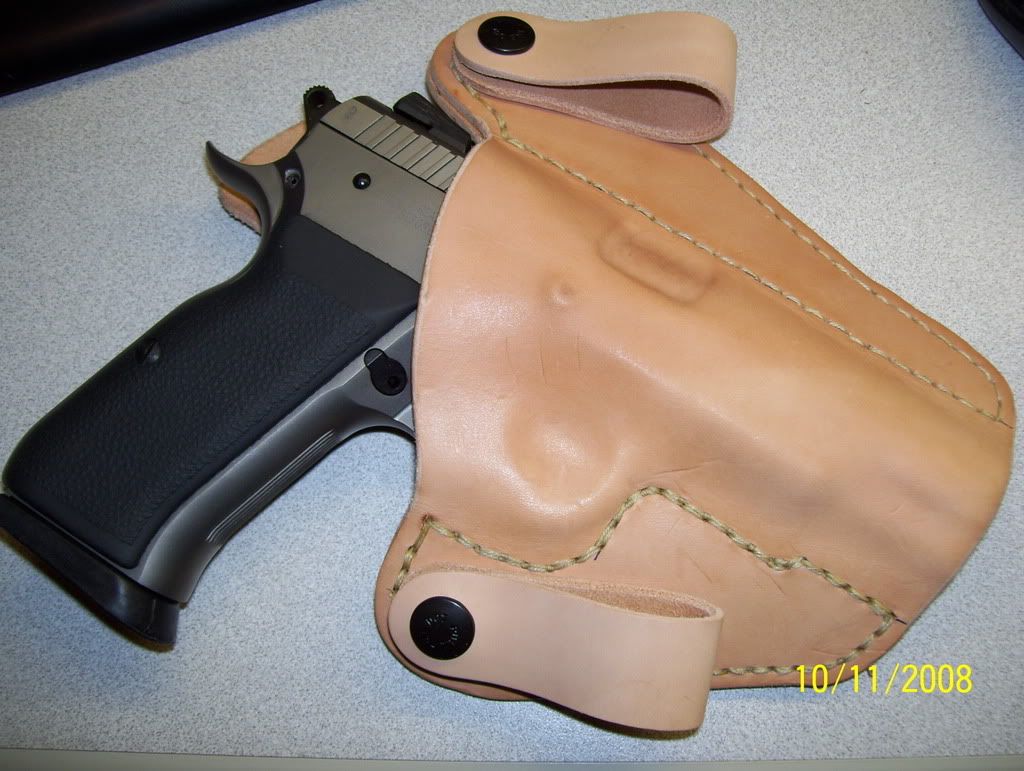
As this is my first go at this, and I used natural polyester waxed thread (read- it won't take dye), I'm going to leave this holster in the natural. Next one will be sewed with my preferred black thread, and will be dyed black. I have no experience with that as of yet, but I'm told to use oil-based dyes and a sealer.
Not bad for a first go, all things considered. I learned a lot here.
I can not thank Nate of UBGHolsters enough for his encouragement, parts, advice and overall brain-dump when it came to my numerous stupid questions. He made what could have been a disaster, easy. I've been wanting to try this for years and after all his effort the hardest part of the job was sewing the leather. By the way- he gave me all this info all the while knowing that I was considering starting up a holster-making business.


2 comments:
what a fine hobby and a beautiful holster.
you sir are a craftsman from the word go!
pappy.
(and a good read to!)
Well, that's high praise indeed, 'Pap.
I have to stress, though- I didn't cut out the shapes. The fellow at UBGHolsters sent me a couple "blanks" he cut out on his click press. With all the curves and so on, I really think that'll end up being the hard part. So I'm presently working on my second holster, with an eye to simplifying the curves. Particularly, the bit that goes behind the rear of the slide- there's three or four curves there that work really well, but I think they'll be a right royal bastard to cut, freehand. I'd like to have those melded into one long curve up, over, and around, but am not sure that will work well once the leather's boned to the weapon. It might "bunch up" for lack of a better phrase.
So- lest I take too much praise here- I assembled a kit, basically. My NEXT holster will be completely my creation, though.
Post a Comment