This is in response to several folks that have asked for more info regarding the stitching and so on.
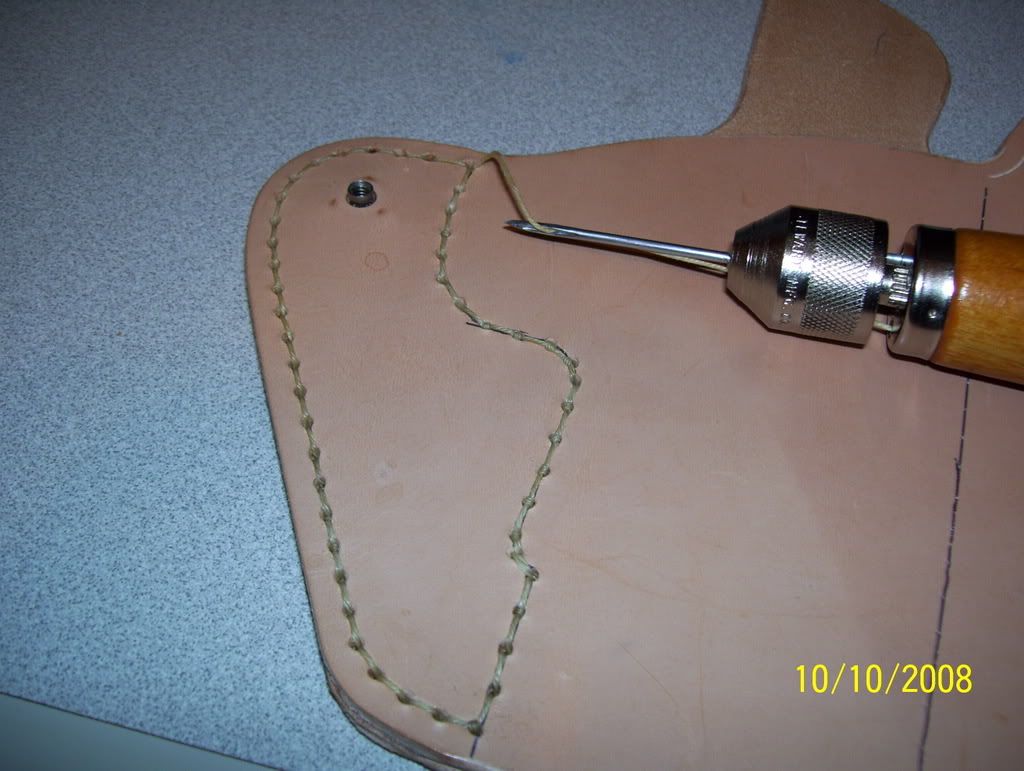 Here you see that I've gone round the back wing, drilling holes with my Dremel first, then doing a simple lock-stitch. Note that the holes are, frankly, too large. I couldn't find my smallest drill bit at the time. I ended up doing a second trip around the stitching to make up for the gaping holes in the leather left by the drill, and my less-than-optimum control of the awl. If you look closely, you can see where some of the knots have come through the front. VERY amateur, but I learned quickly!
 Another, closer, view of same. Also note the T-nut that I forgot to mention installing. Install is simple: drill hole (come to think, that was already done, too- did I mention Nate made this EASY?), insert T-nut, then glue the two halves together. Closer stitch detail, too. See what I mean about the knots coming through the front? Beginner mistake!
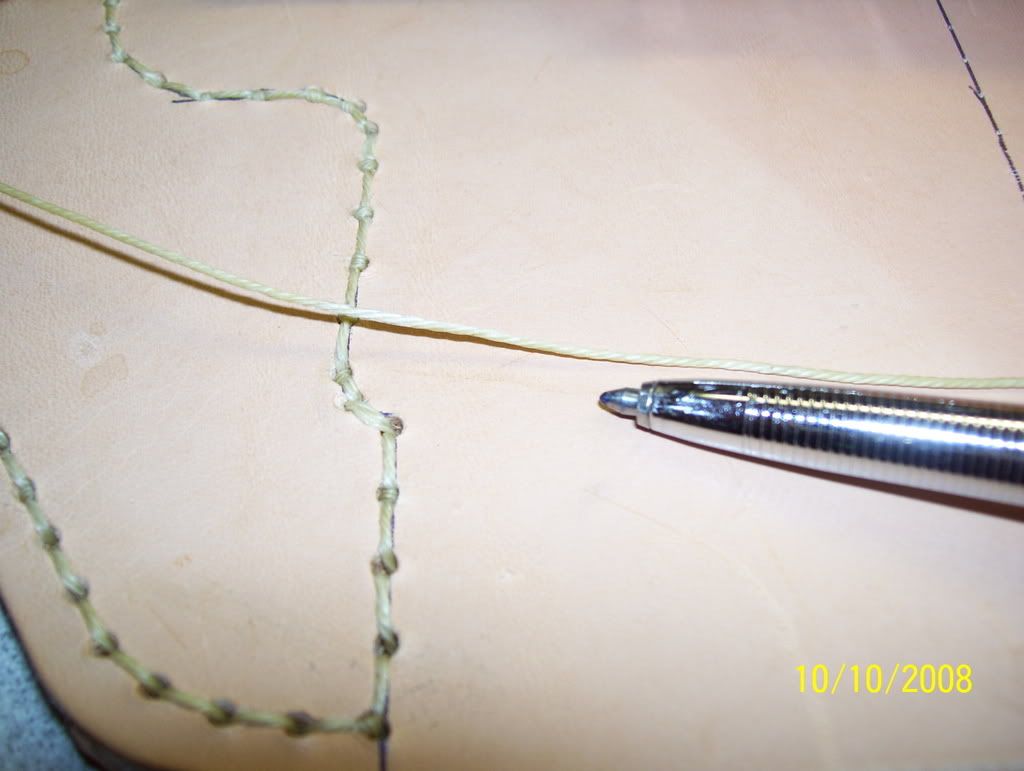 Closeup mainly to show the size of the line I am using. It's too big to call thread, too small to call rope. Waxed polyester, has a pretty hefty breaking strength. Yeah, it'll work! BTW- if you're looking for a sewing awl, by no means go buy one at your local boater's shop. I paid $27 for one at West Marine (well, I needed it THEN, to repair my ruck, going camping with the kid the next day). I could have gotten one for $13 online, and I stumbled across one VERY similar in Harbor Freight, with a 100-yard (as opposed to 30) skein of line, for $5 a few weeks later. Hell yes I bought it- I can't even get the line itself that cheap elsewhere. Need one? Drop me a line! (You see, how I made that little pun there... I am a kidder. I kid)
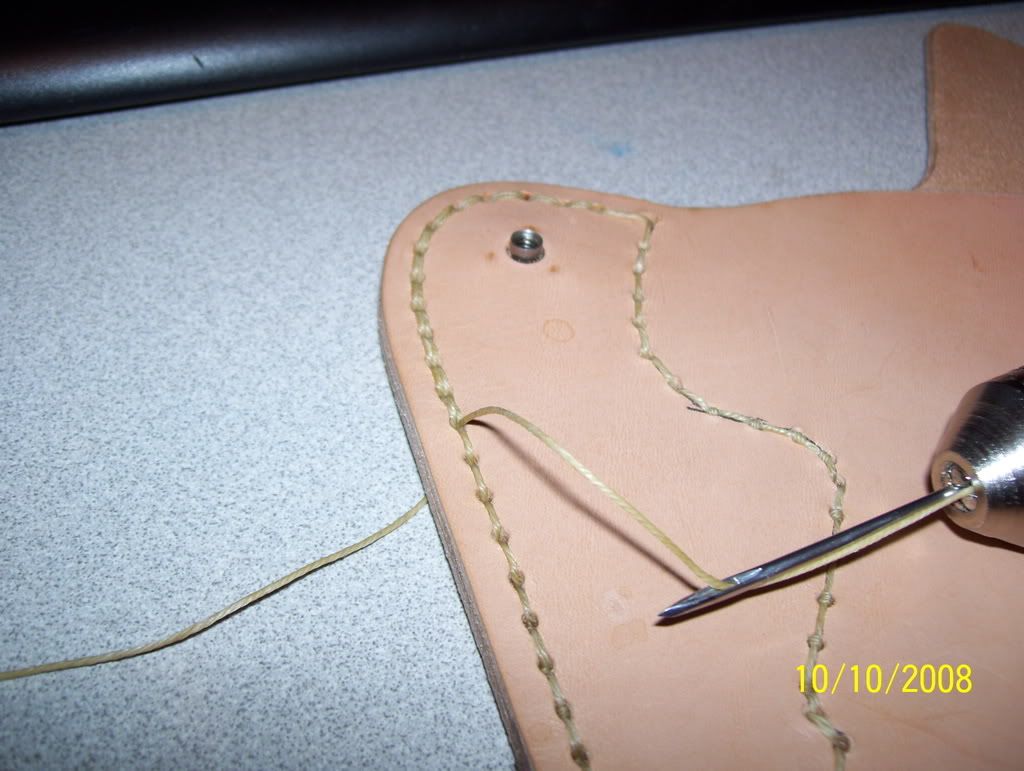 I should have mocked this one up better. What you are looking at is how the lockstitch works. Basically, poke the awl through the holes, then pull out a quantity of line on the back side, at least enough to go around the perimeter 1.5 times or you'll be cutting and retracing your route often to get a good lock. Getting the string to the back is easier said than done unless those holes are WAY too big. Solution: Punch awl all the way through. Pull it about halfway out. Use the tip of a spitzer round (or a pen, chopstick, whatever's handy) to grab that loop, and pull the awl through. Now pull the bitter (loose) end of the line through. Poke the awl through the next hole, withdraw, and run the bitter end through the loop. Pull on both lines, you've made a stitch!
I'm not real clear on the proper way to terminate the stitch. I backstitch two stitches, then run the bitter end through the loop three times, then pull. Cut flush, and apply brief heat to the remaining bit of the line. This ought to work.
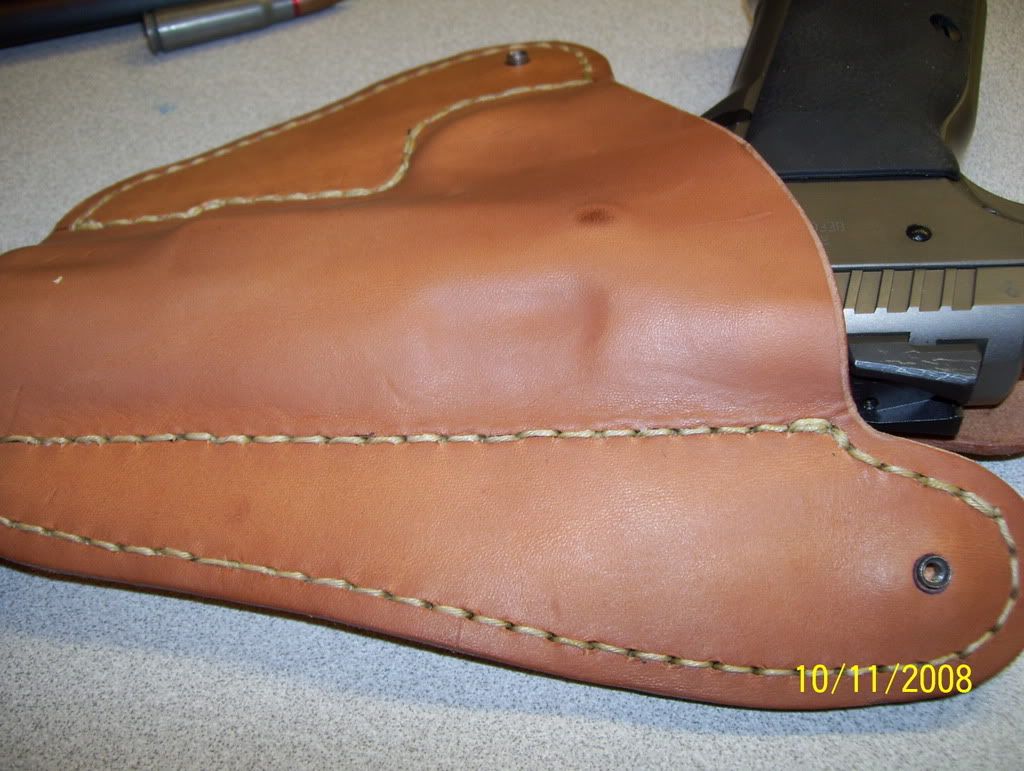
 Second lap of stitching on the back wing, completed. Looks a lot better now. For production use, I will run a double row of stitching up against the weapon as it's a high-stress area. Otherwise, single will be fine.
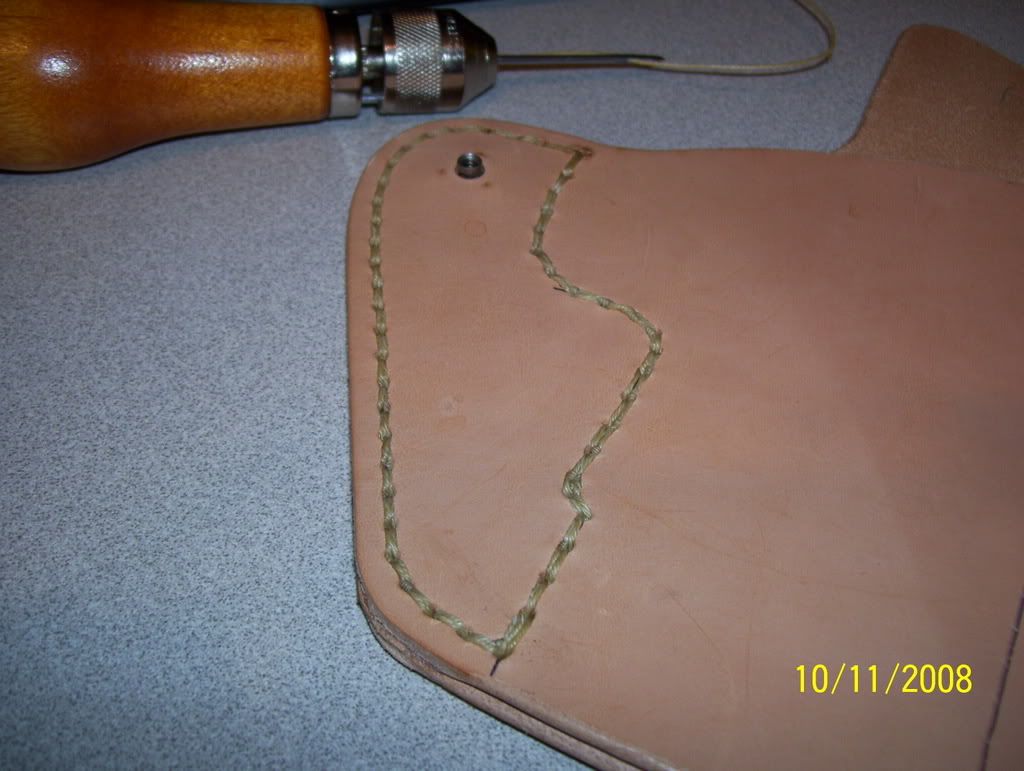
 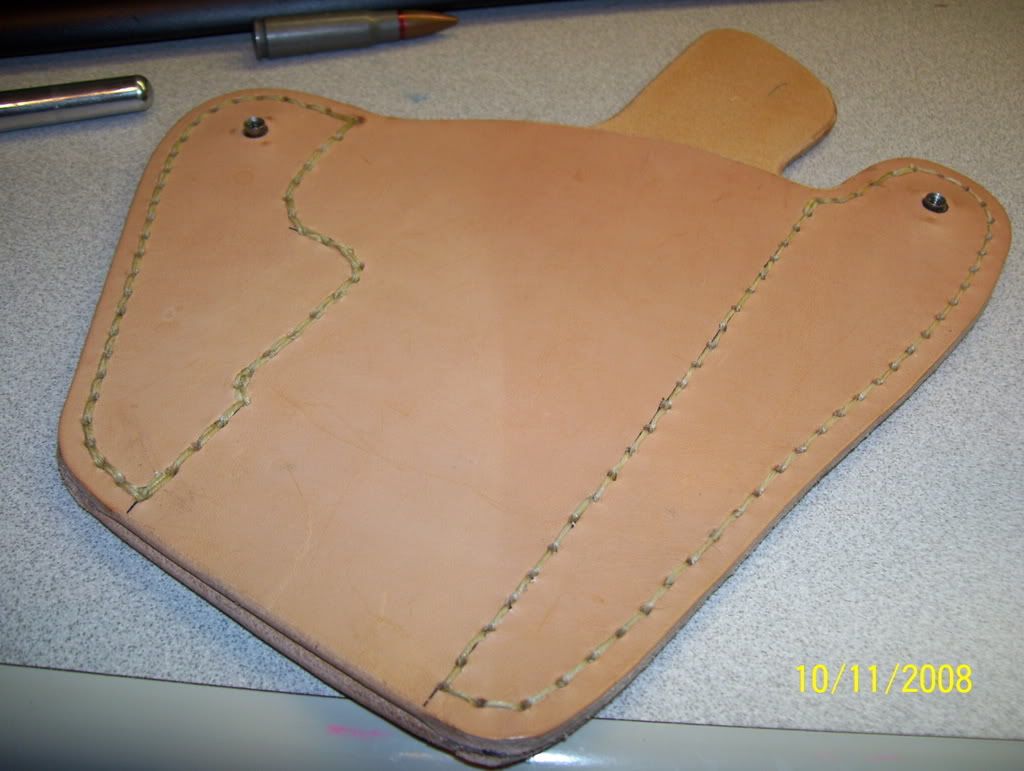 Front wing completed now, too. Can you notice the difference? I found my smaller (smallest) bit, so only had to run one loop. Also, I had figured out how to run the awl properly at this point, ending up with the locks in the middle of the holes, not on the front or back. MUCH more professional. Almost looks like I know what I am doing, huh?
 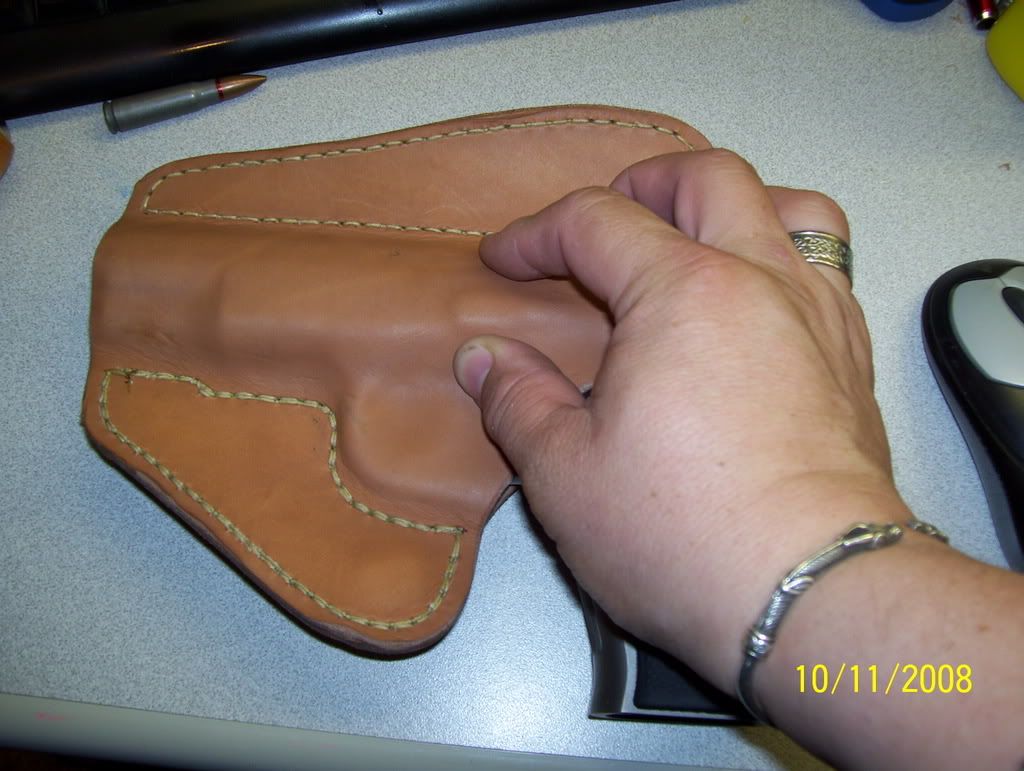 I've wet the leather, just to the point that it's darker-brown. Literally a minute in very hot bathwater. Put it in the tub and swish it around- when it is uniformly dark, it's ready. It's very much like working with stiff clay at this point. You can see I've started the boning process, the trigger guard, dust cover, and takedown lever are most evident. Yes, I am a man that wears jewelry. Celtic stuff, mainly. Shaddup.
 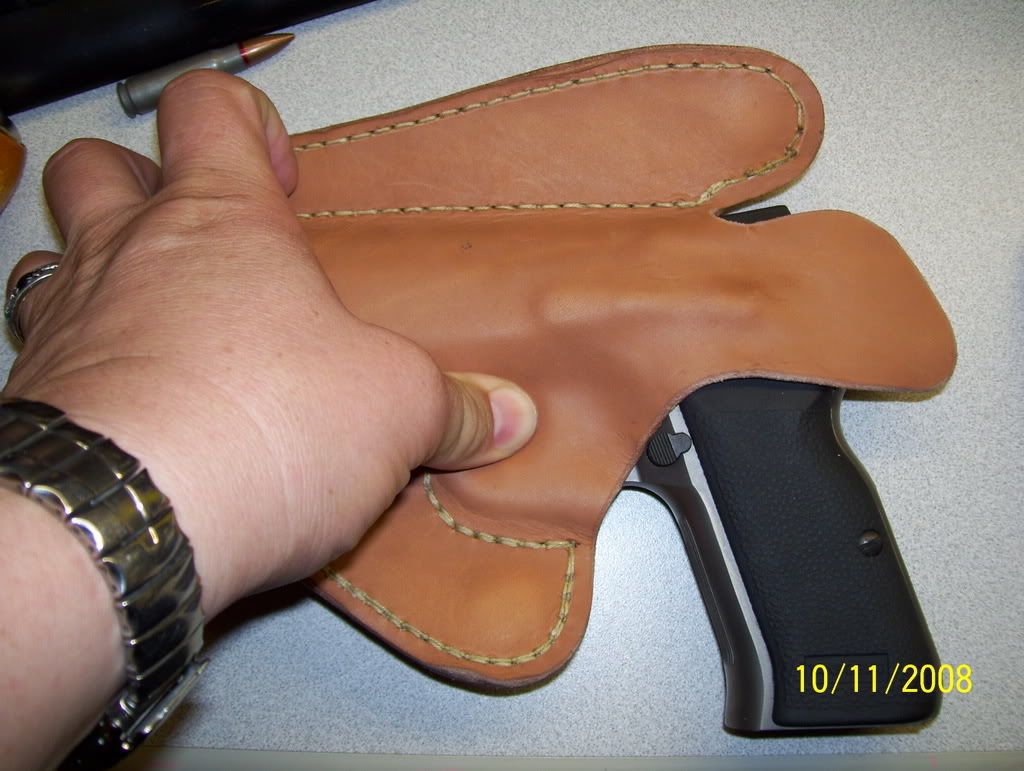 In the name of safety, and not wanting an AD when reholstering, I use an ultra high-tech, precision-engineered Trigger Guard Embossing device. OK, so it's my thumb. This ain't rocket science, folks. As a famous holster-maker once said "There's only so many ways to wrap leather around a fuckin' gun". Curmudgeonly fellow, that. I think I'd enjoy his company.
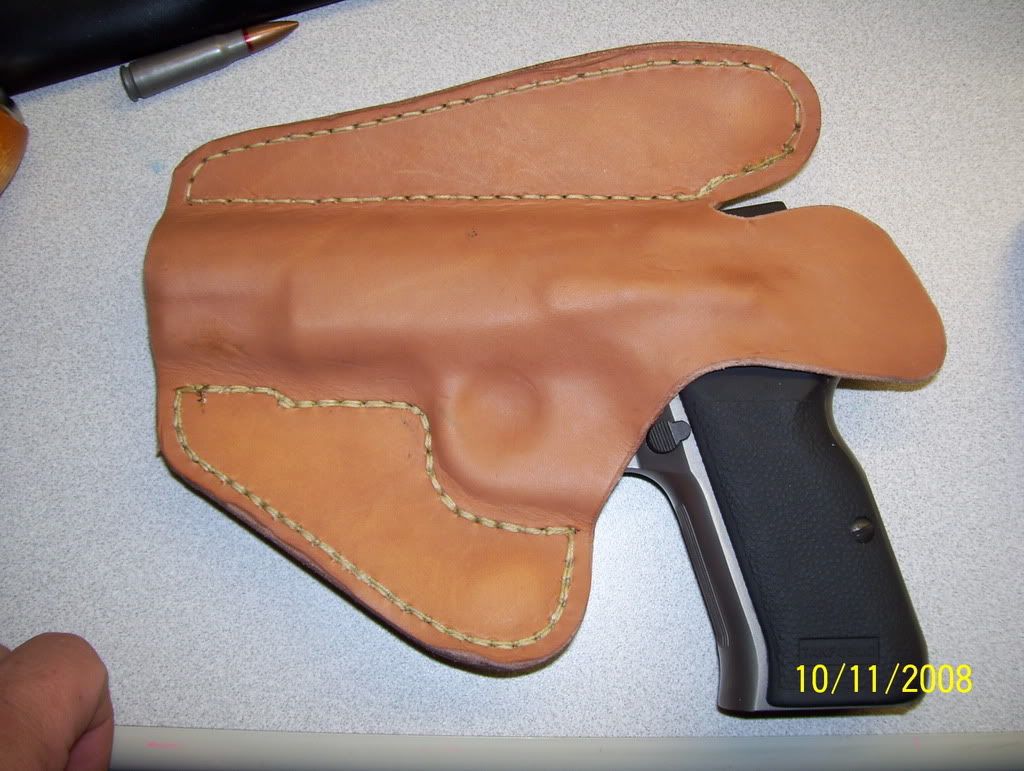 Hey, if it's stupid but works... it ain't stupid. 'Nuff said.
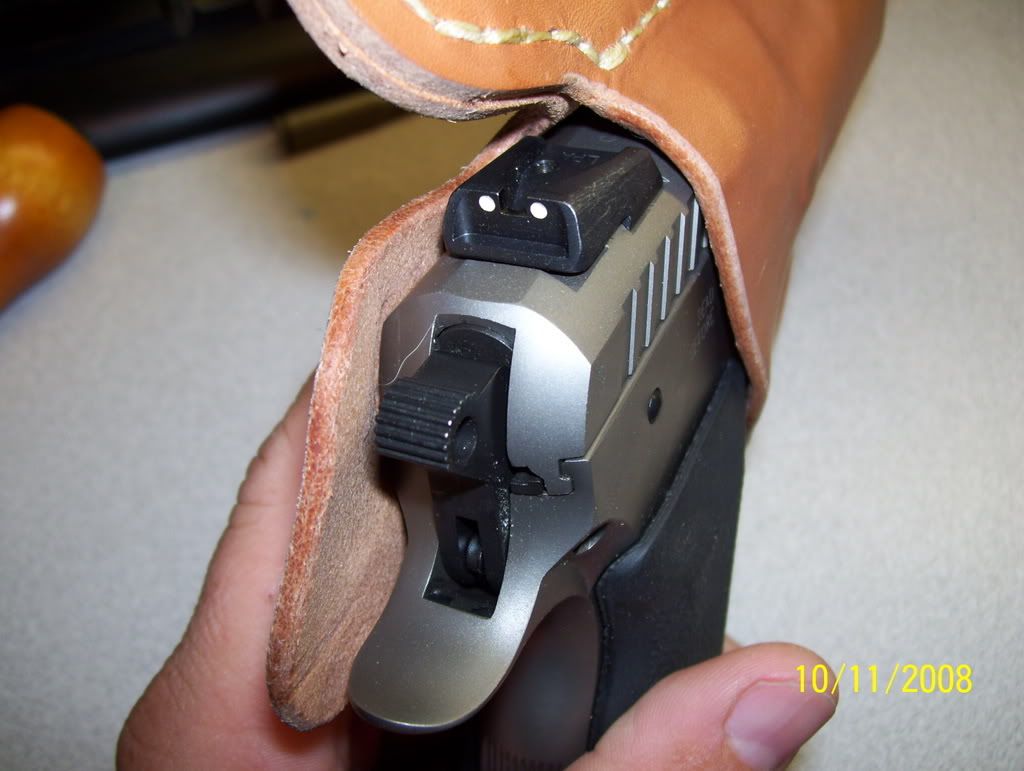 As you can see, there's a VERY snug, secure fit. This weapon won't come out unless you mean to use it.
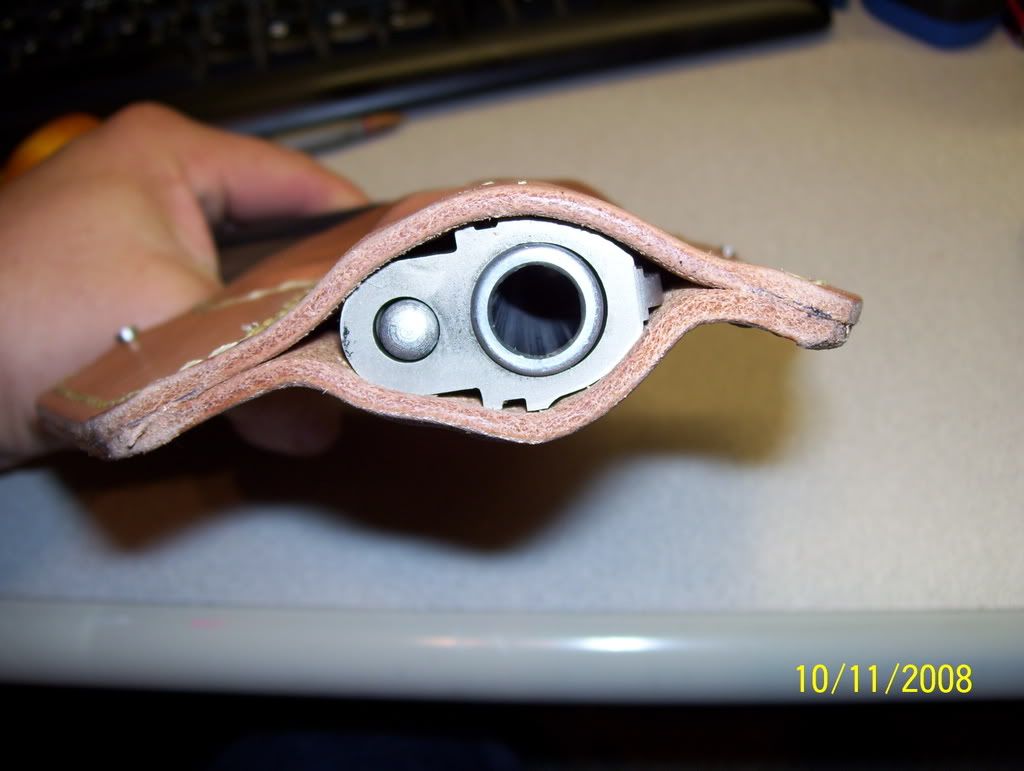 YES, I know. Shut up! I am flat-out OUT of ammo for this weapon at this time, the safety is on, the trigger is covered, and my finger is nowhere near the trigger. Also, I cleared the weapon three times before putting it in the holster. I'm not a complete idiot (there are parts missing!). Nice view to show how the boning is split between the halves of the holster, to suck it into the hip more. Also, all the better to marvel at these cheap 6MP cameras that are out now. Why did I wait so long?
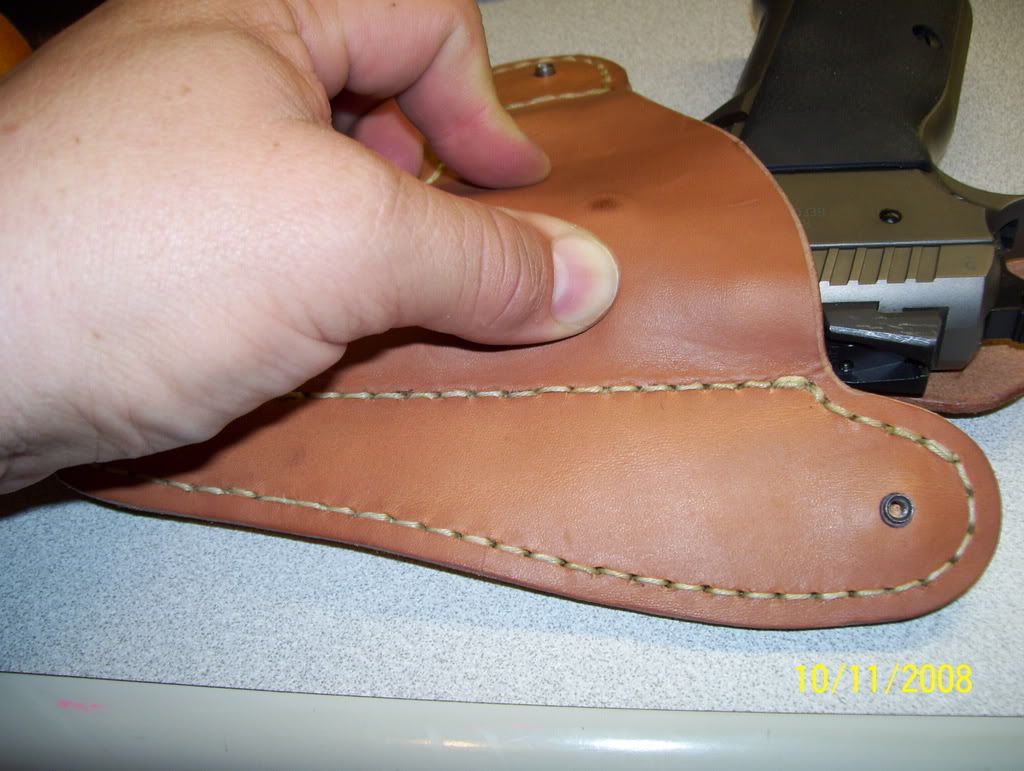
 Two shots of attempting to bone the ejection port with my thumb. Fail. While it's good enough for some folks, I like a holster with a well-defined ejection port- better retention. Hmm.. what can I use to better emboss this? If I only had some more deer antler left over I could make a tool with my Dremel tool...
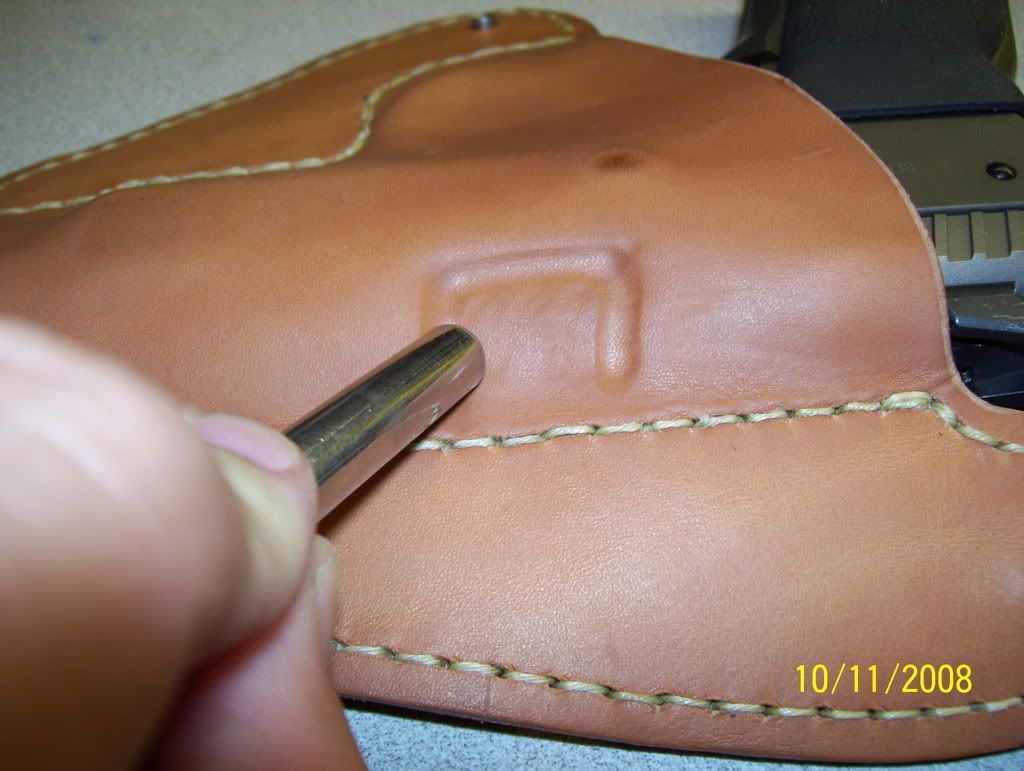 That's the ticket! A Fisher compact Space pen. Not only does it write in zero-g, vacuum, upside down, and prevent global thermonuclear war while saving the Apollo-13 astronauts- it also makes a damn fine embossing tool for wet leather. OK, so would a AA battery. But darn, now I have these nasty over-emphasized embossing marks around the port that look like crap. This would be easy to fix it this was really wet clay. Hmmm...
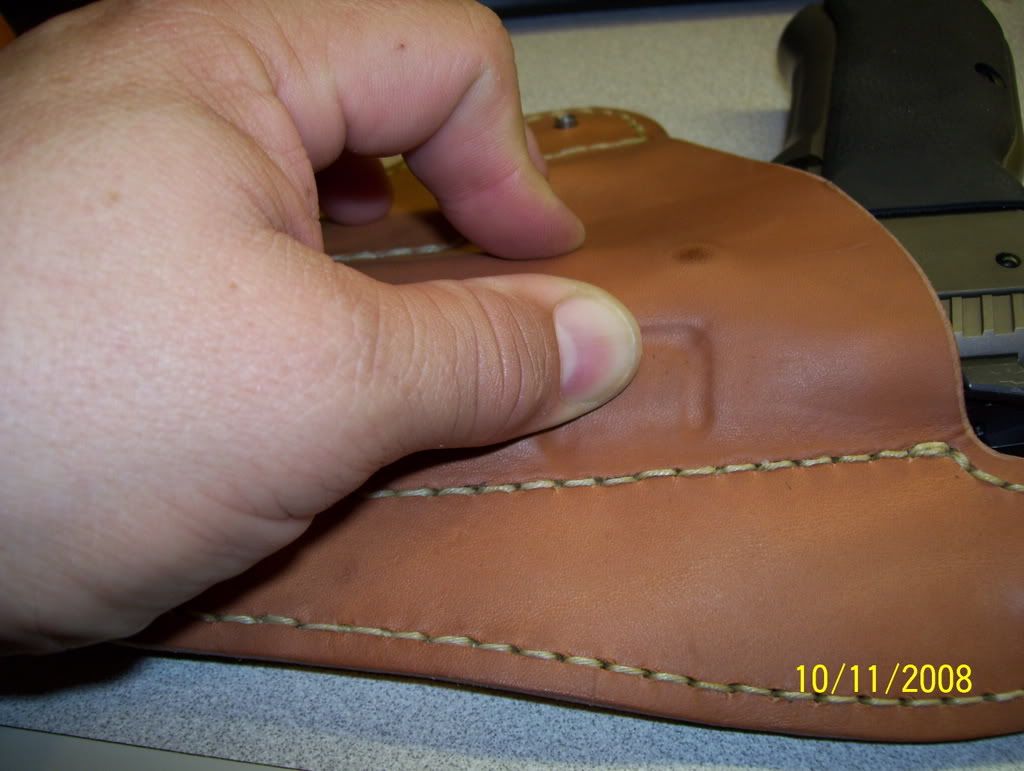
 Nice! Apparently the wet clay metaphor was more accurate than I realized.
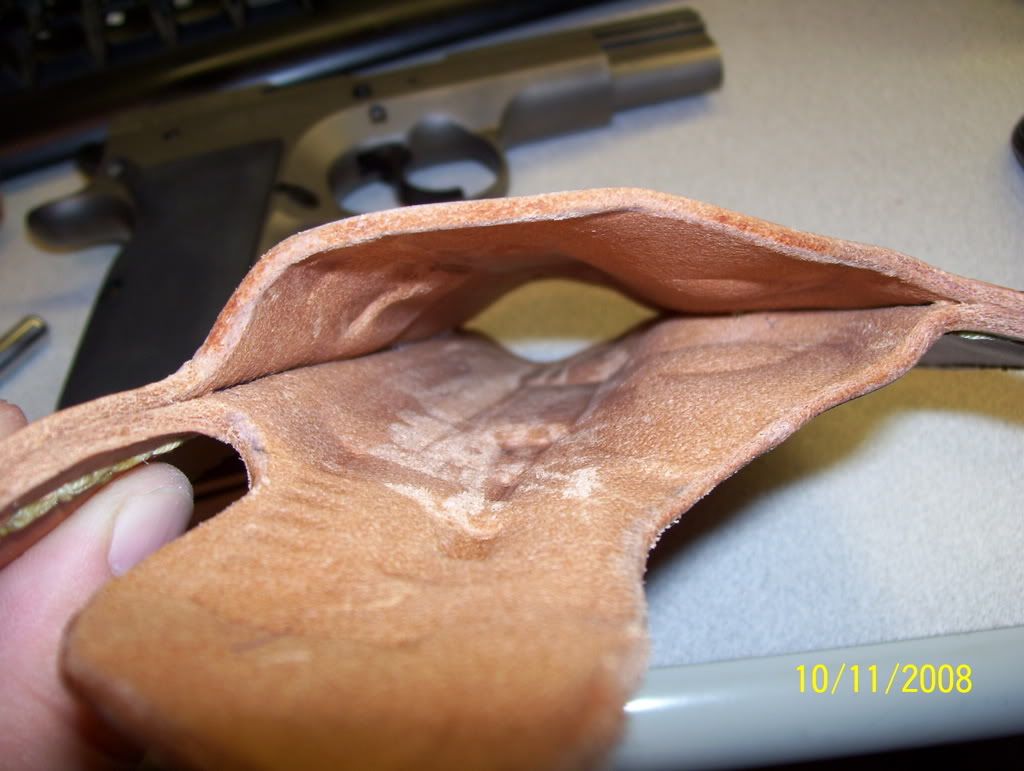 A very well-boned holster.
 I've got to invest in a better backdrop. Are you folks tired of seeing my keyboard and desk yet?
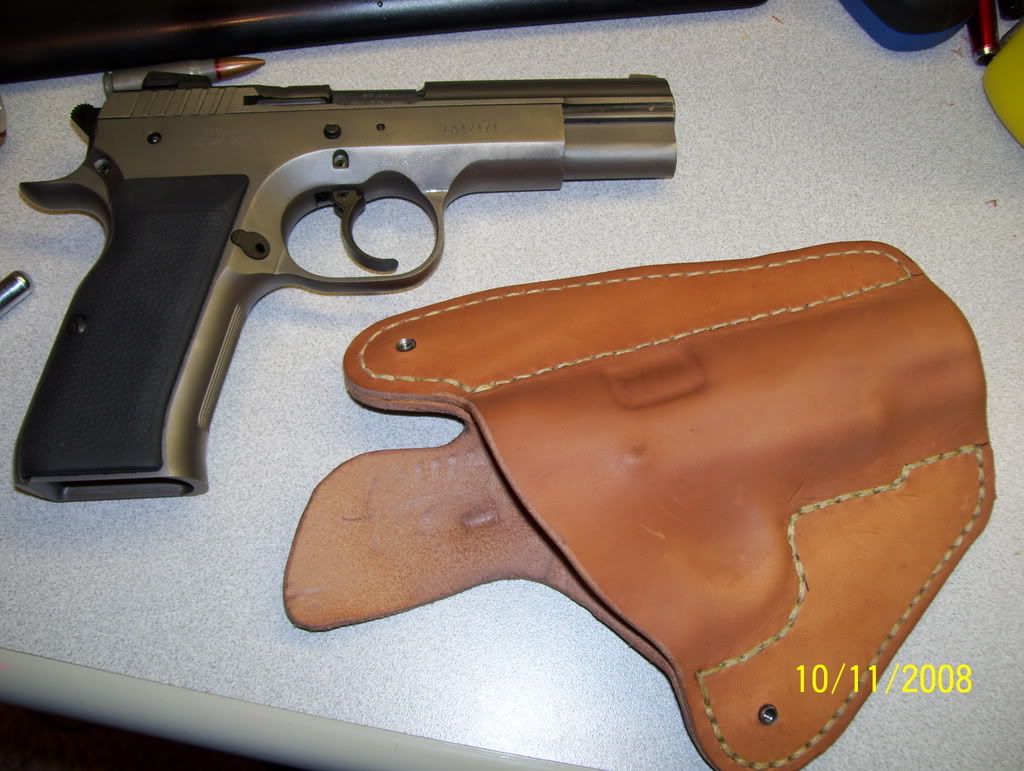 Finished product shots
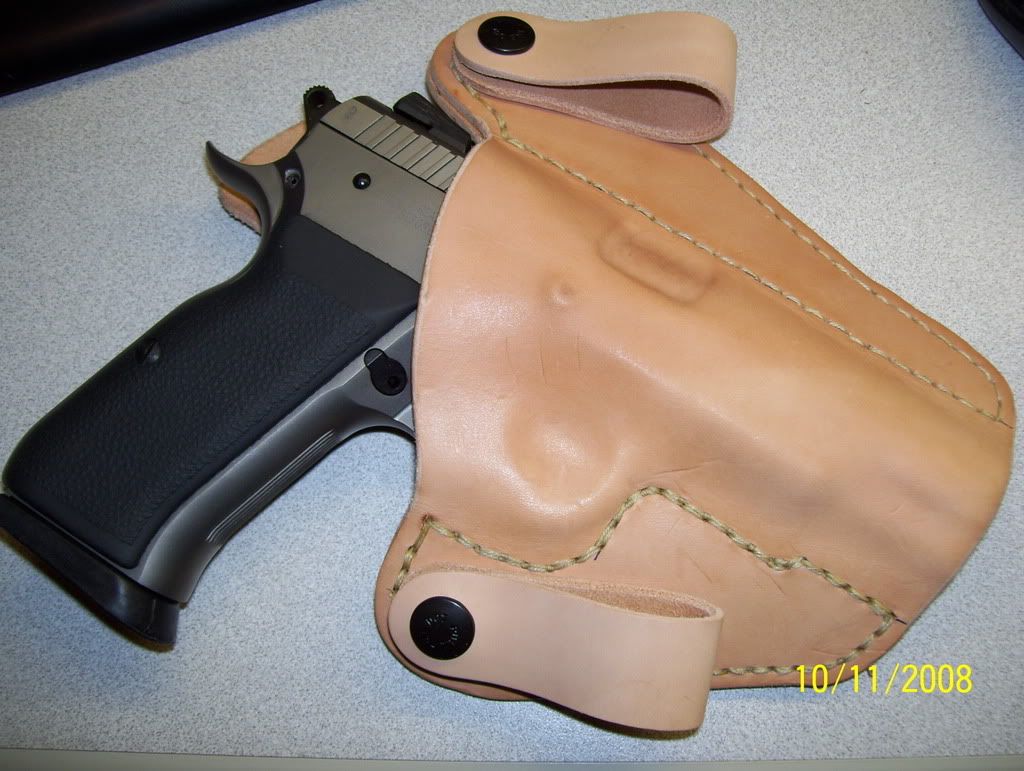
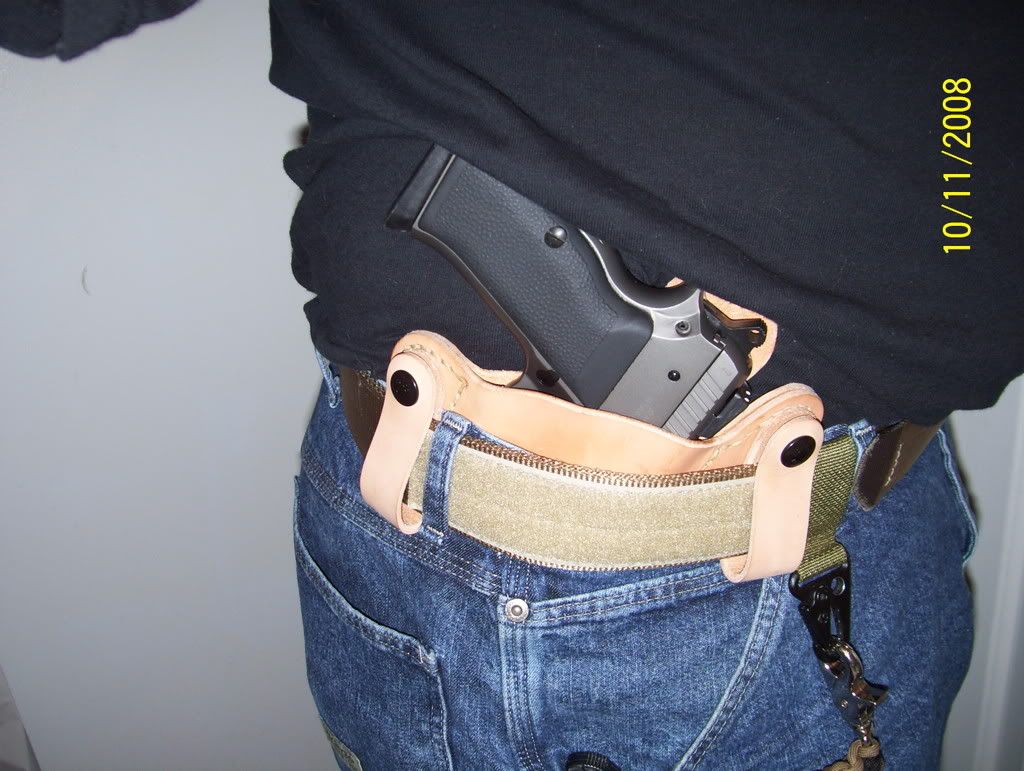
 It wears well, too!


7 comments:
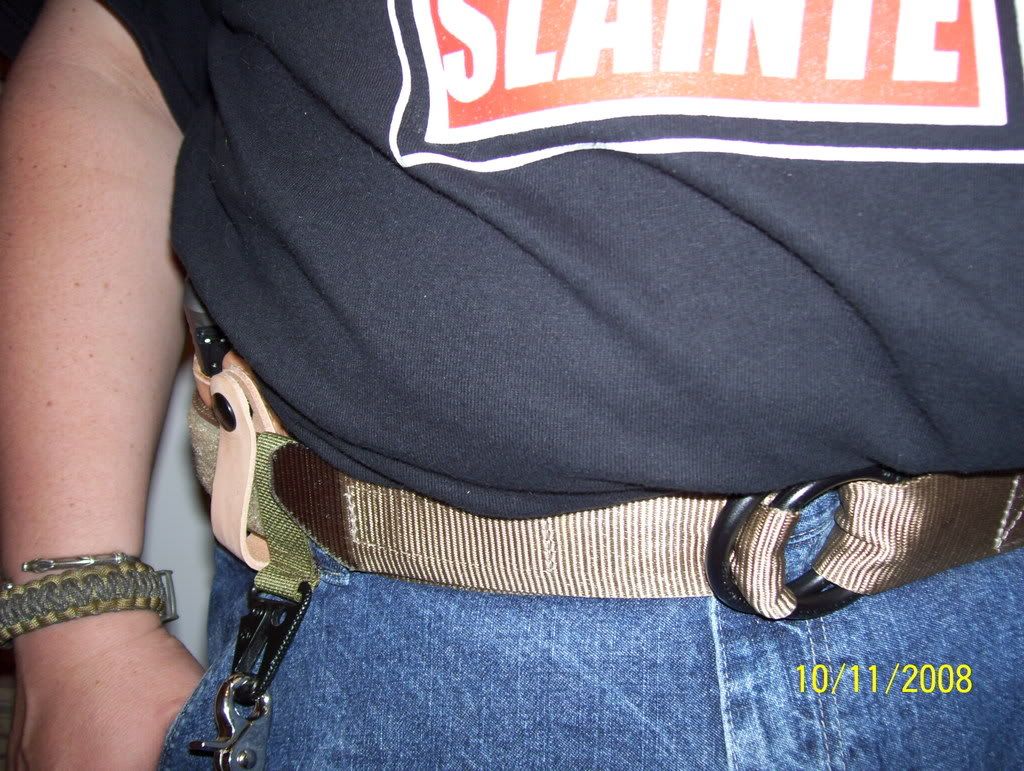
Now that you have a Holster for that Witness you should invest in a good belt.
The Beltman's stuff can't be beat and easily outclasses all the belts you can find off the rack.
Hell, I didn't buy the holster, why would I buy the belt? :)
Actually, the belt I have on in the pic is a Wilderness Tactical Instructor Frequent Flyer. VERY nice, supports my carry quite well.
Looks good! Honestly, I really enjoy doing the color. It's my favorite part. But then again, I am wearing a purple holster. Not sure that's really the look you are going for.
You've probably seen mine on my hubby's blog.
Thank you, ma'am.
Yeah, I am actually pretty anxious to give the dyeing a hand. But I don't have a leather supply place 'round here, and want to make sure I only have to place one online order, times being what they are.
I'll keep this one "au natural" since I used a poly waxed line- read: won't take dye. Brown and black line are on my short list of things to order, along with a #3 edger and dye/sealer.
I wore it around for a couple hours yesterday. It worked out very well! Now I just need to load up some 10mm loads and decide if I really want to carry such a heavy caliber. See "Harold Fish" for why this is a concern.
Oh, BTW Jennifer:
Thanks to you and hubby for the encouragement. I first caught wind of such a project via his post on the High Road. That was the main impetus that got me working on this.
Now I need to find someone with a revolver 'round these parts needs a holster. Hmm- come to think, a friend is looking to get her CWP and is pretty set on a revolver.
Nicely done! I can nearly guarantee that you will be more excited about your next one. It's really cool that UBG was so obliging, but to come up with your own design and go from raw material to usable beauty is a different animal altogether. Those Space Pens are nice, aren't they? They have a million and one uses. I've worn the black finish off the ends of my Bullet by scoring cardboard. The thing is getting pretty beat-up, and I'll probably be replacing it sometime in the foreseeable future. Thank you for the kind words, and I'm glad to see that you are enjoying the project.
Thanks Michael-
I'm looking for a local source of leather at present, and will be making my own holster completely from scratch shortly thereafter.
Of course I'll post results.
Post a Comment